

When combining table entries, numerous combinations are generated. However, some of those combinations may be undesirable. For example, a particular brand may not be producing shoes. Merchandisers usually don’t want to promote products they don’t sell. Relations are used to ensure only desired table-entry combinations get exported. There are two different kinds of relations:
- Manual relations – Can be used to create relations between two tables
- Mapping table – Can be used to create relations between any number of tables
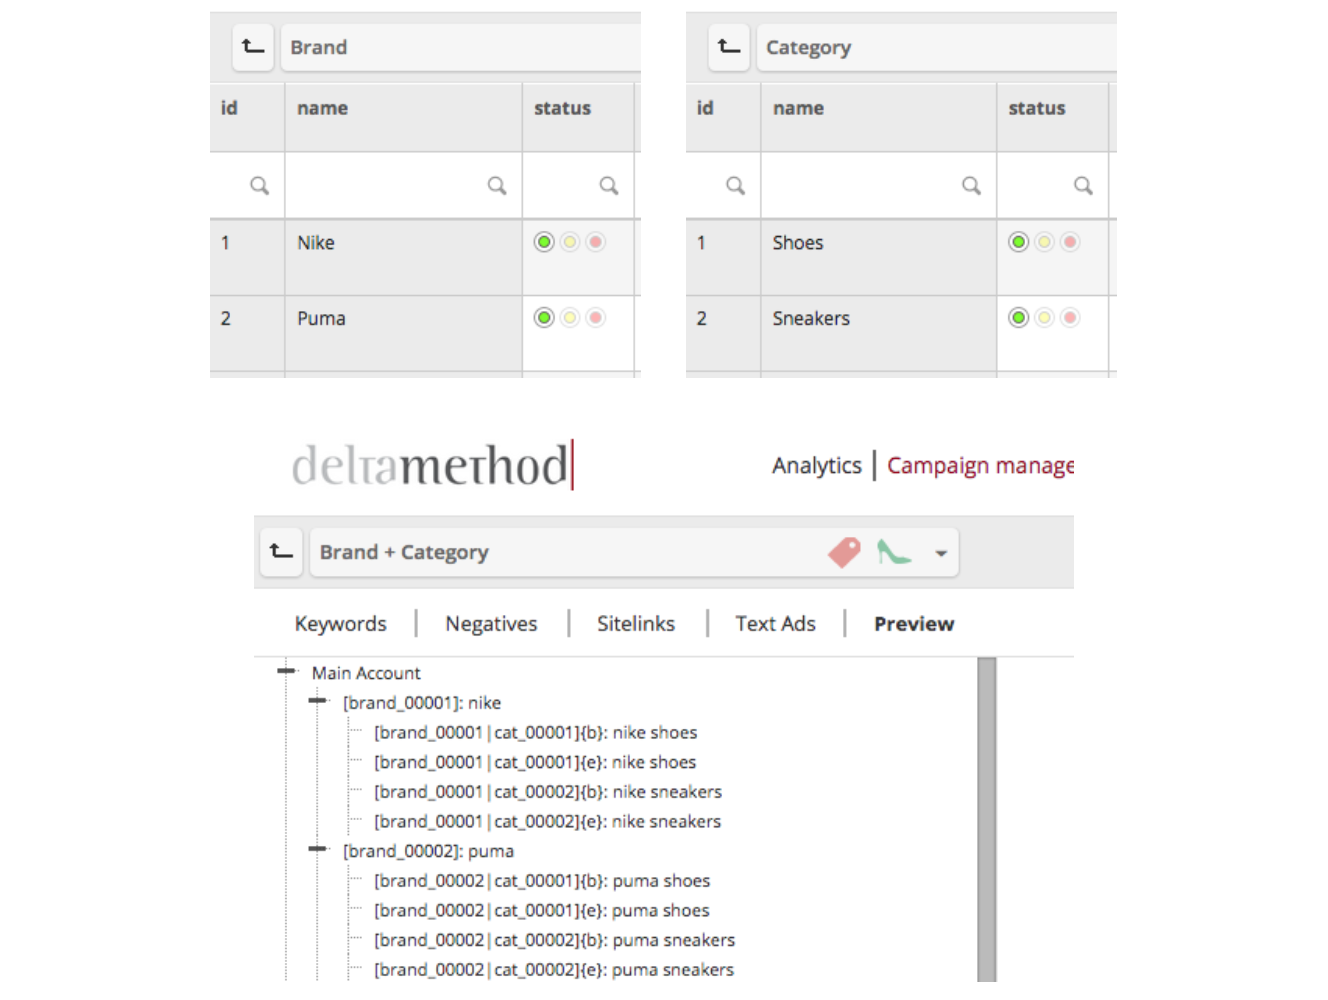
Assume we don’t want certain combinations to occur in our advertisement campaigns. In this example, we chose “Puma Sneakers”. Using relations, we can easily achieve this result.
Manual Relations
Manual relations must be set up manually. Each table entry can be linked to entries from other tables. While they are simple to understand and set up, the main drawback is that it’s not possible to remove only a combination like “blue adidas shoes”, if this consists of three tables (color, brand, category). Manual relations allow you to remove the combination of “blue” and “adidas”, the combination of “adidas” and “shoes”, or the combination of “blue” and “shoes”. They only work between two tables.
Two different approaches allow you to achieve the same result:
- Inclusion
- Exclusion
Without any relation, all possible combinations between tables are generated. ‘Exclusion relations’ allow you to exclude combinations. This means all but the excluded items will be created. ‘Inclusion relations’ allow you to include items manually. As a result, only the included combinations will be generated. For each table column, only one type may be selected. In the relations window, the default relation type can be chosen for each of the related columns during a relation’s setup.
Step 1: Add new relation
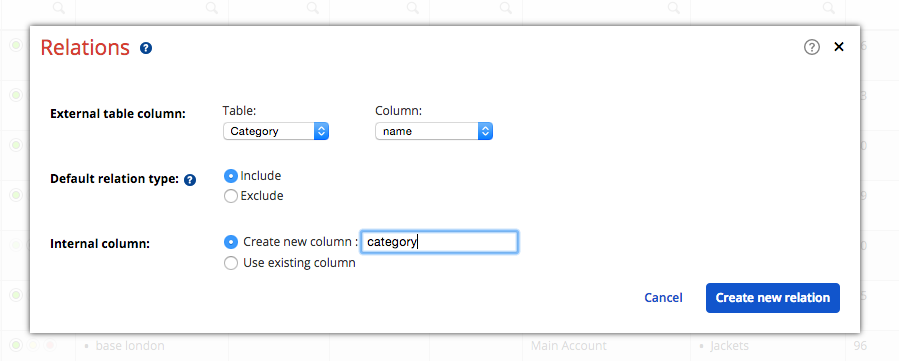
In the destination table, click “Relations” and a dialog box will appear.
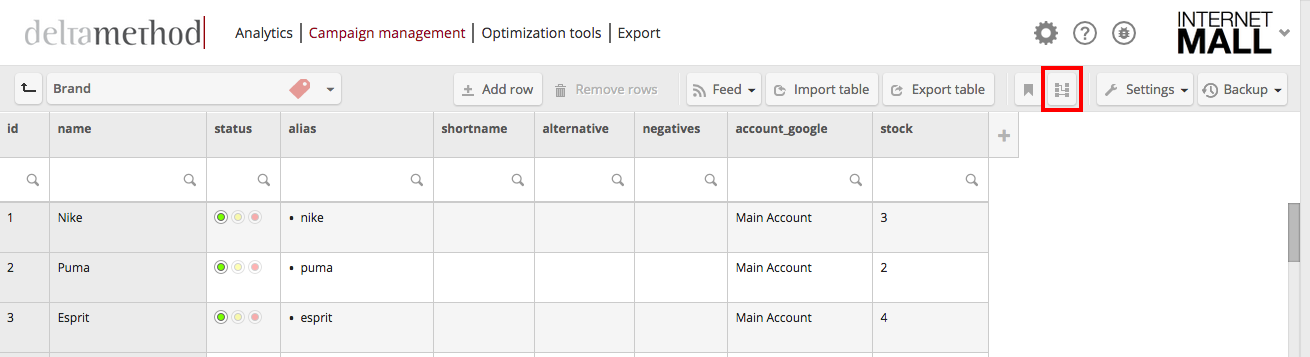
Click “Add a new relation”. Inside the dialog box, choose the external table column you want to create a relation for. Decide whether you want to include or exclude the related entries. Choose the column in which the related column values should be shown. If you want to use an existing column, this column needs to have the column type “list”. Click “Create new relation”.
Step 2: Manage related entries
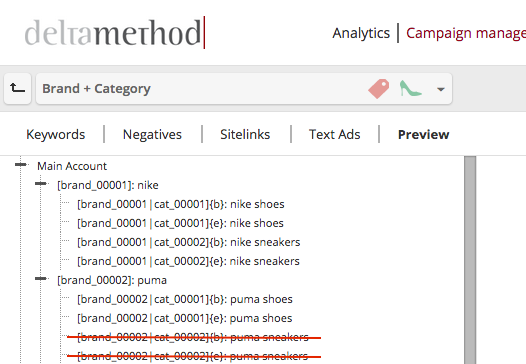
Add all entries that should be supported in the destination column. (For the above example, relate ‘Nike’ with ‘Shoes’ and ‘Sneakers’. For ‘Puma’ only relate it with ‘Shoes’, as the ad group ‘Puma Sneakers’ should not be generated).
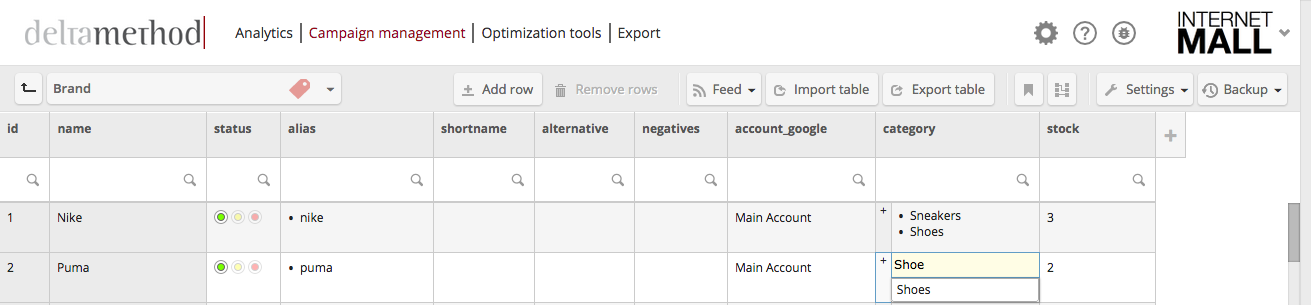
As a result, no ad groups for ‘Puma Sneakers’ will be created, because the relation includes only ‘Shoes’.
Mapping Relations
Mapping relations are based on mapping tables. Mapping tables are lists of all allowed table combinations. In practice, search term mapping tables and product feed tables are used for this purpose. Those are created automatically – either by creating a search term mapping table or by importing an existing product feed into a table. However, it’s also possible to create a mapping table manually. A mapping table must contain one column for each managed table. From each of these columns, a relation must be set up to the name column of the corresponding table. Each column is only allowed to have one list item per field.
For example, if a mapping table manages the combination of a brand table and a category table, it must have one column for brands and one column for categories. The brand column must be related to the name column of the brand table. The category column of the mapping table must have a relation with the name column of the category table. These relations only have one purpose: Telling the platform which table entry belongs to which entry of the mapping table.
Note: If the content of a mapping table (e.g. a product feed) should be used in a template, you must create a new table and connect the same product feed. In the feed wizard, select only the column(s) containing the desired content, and import the feed. Then use this new table in the template. Furthermore, especially mapping tables, which are product feeds are often also used for inventory-based status management. Please note, this is only possible if the product table is not assigned to the template.
Step 1: Mapping table
This guide describes how to manually create a mapping table. Alternatively, you may create a search term mapping table or import a product feed.
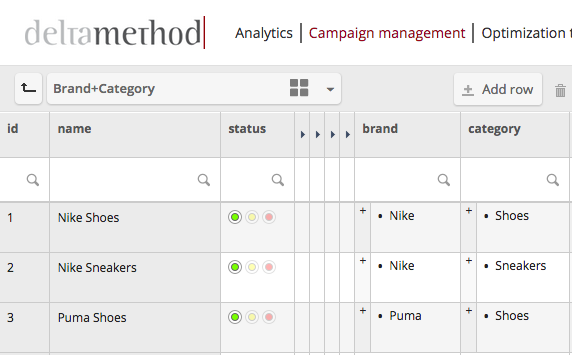
Example: This mapping table has relations to both the brand and category table. Each row represents a product that will be offered. Thus, the respective entries from the brand and category tables have to be mapped. In this example, only three of all possible combinations will be generated.
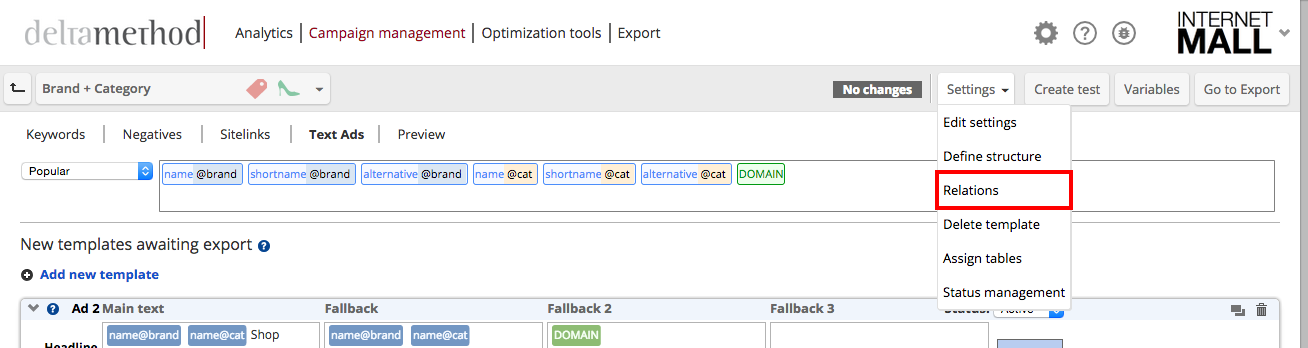
Step 2: Apply mapping table to template
In the template, click “Settings” and “Relations”. As the content of mapping tables is usually not used for the creation of Keywords or Ads, the best practice is to not assign them to templates. This also ensures they will not be part of the default ad group naming.
Activate the option “Create items only if they are referenced in:” for the mapping table and save the changes.
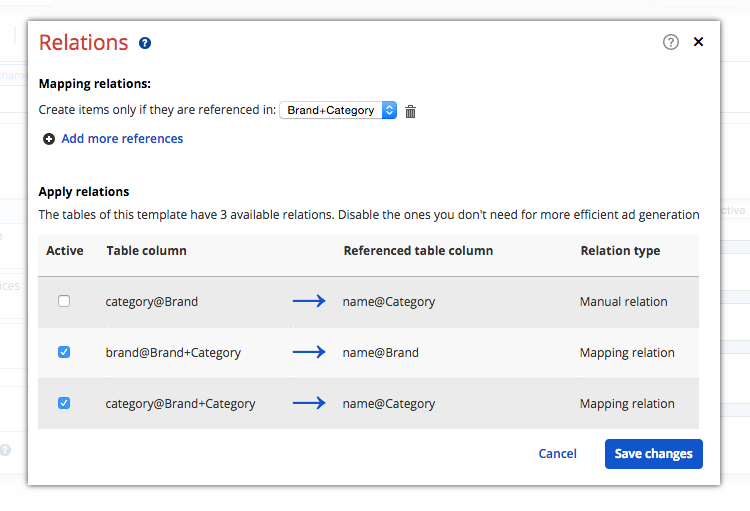
Note: In the image above, the manual relation that was set up earlier should be deselected. This is done to avoid interference of the mapping.