Many companies use software systems that enable them to publish product feeds. These feeds usually contain information about the offered products, such as product characteristics, URL, status, or dynamic inventory. Having this information available in Crealytics’ Search Platform can be very helpful. Follow these steps to make sure the feed is automatically imported into any desired table of your account on a regular basis.
Step 1: Add new product feed table
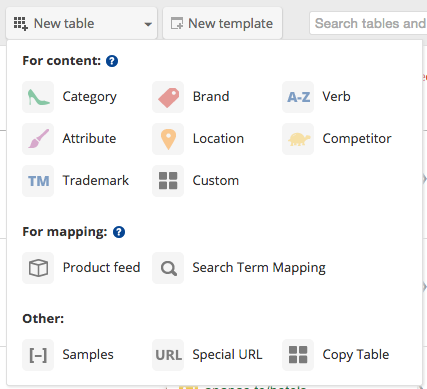
In the “Campaign Management” tab, click “New table” and select “Product feed”.
Step 2: Enter URL

In this step, choose a name for the final product feed table. After that, enter the URL of your CSV table or upload a file from your computer. If necessary, provide credentials.
Step 3: Preview
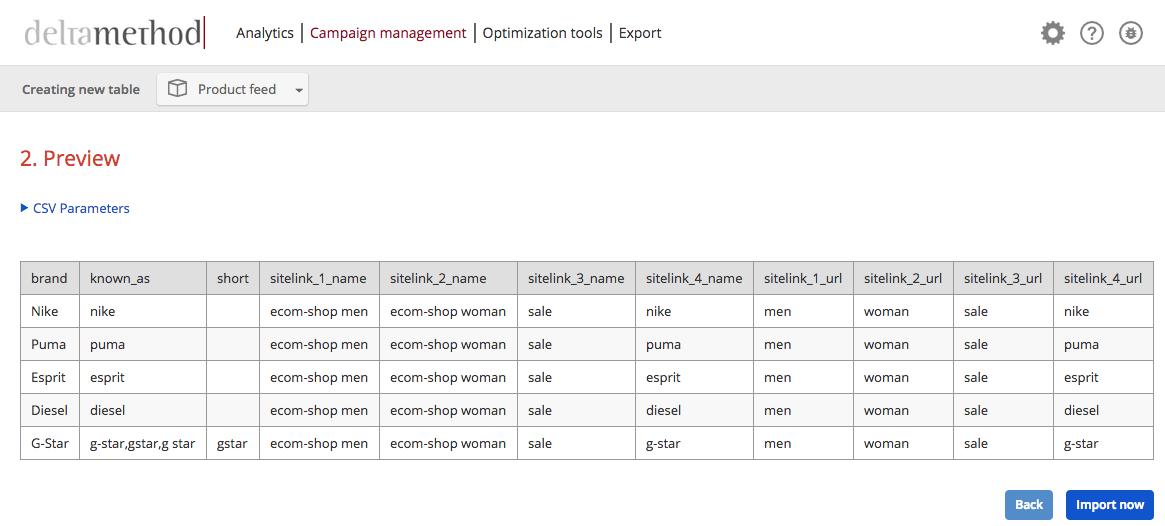
This step gives you a preview of your product feed. It will be imported into a new table as it appears. Click “Import now” to proceed.
Step 4: Automatic Update
If you provided a URL in the first step, you now have the option to schedule regular automatic updates of the product feed table. This will cause the CSV file to be downloaded from your server at regular intervals.
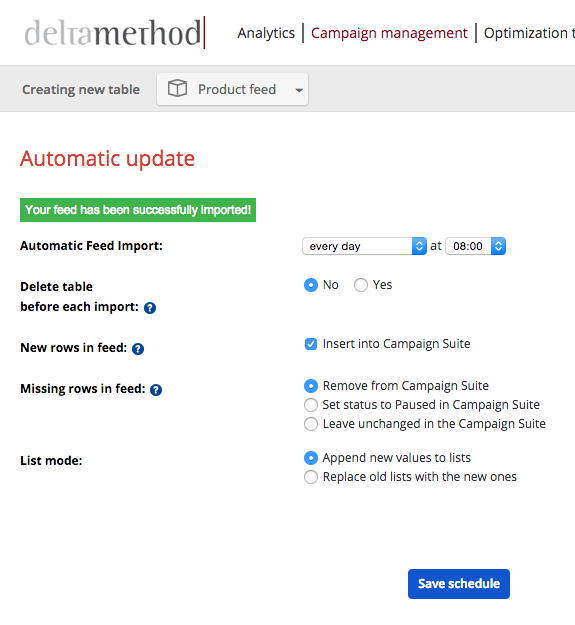
New rows in feed
Decide if you wish to add rows to the table that exist in the feed, but not yet in the table.
Missing rows in feed
- “Remove from Campaign Suite” – removes rows that exist in the table, but not in the feed.
- “Set status to Paused in Campaign Suite” – keeps rows in the table that do not exist in the feed. The status of such rows is set to “Paused”.
- “Leave unchanged in the Campaign Suite” – leaves rows in the table untouched if they do not exist in the feed.
List mode
If the table and feed both contain the same list, but with different entries, you have two options:
- Keep the old table entries and add the entries from the feed
(“Append new values to lists”) - Empty the table version of the list, and replace it with the version from the feed
(“Replace old lists with the new ones”)
Back in the table, the “Feed”-button’s icon will have turned slightly green. This indicates that a feed is connected and automatic import is scheduled.
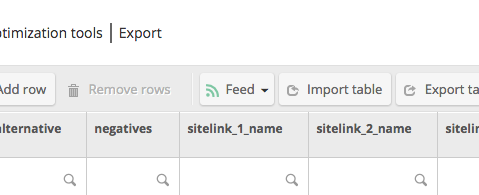
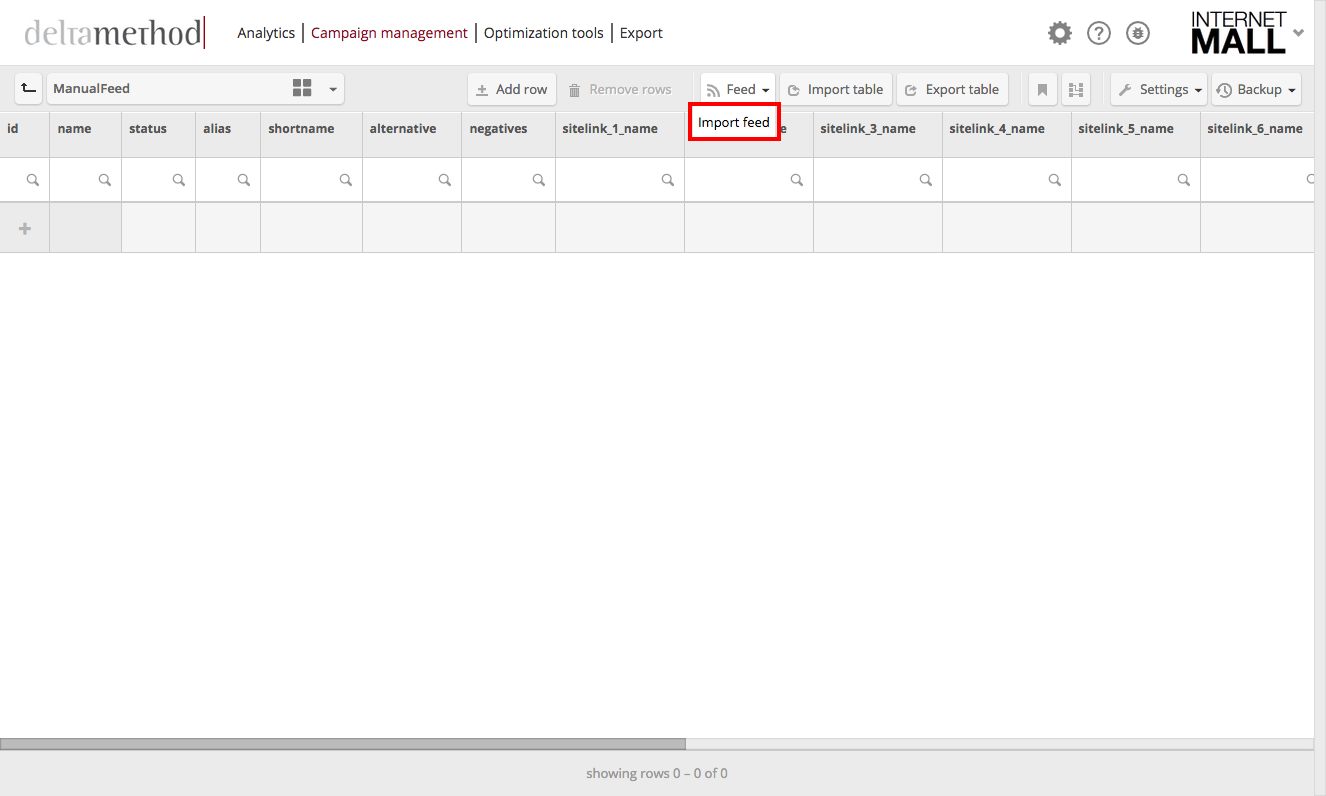
Step 1: Import Feed Button
Go to the desired table, where you want the feed content to be imported. Click “Feed” and select “Import Feed”. The “Import Feed” dialog opens.
Step 2: Enter URL
Insert the URL of the feed. If the feed is protected with a username and password, enter them into the respective fields. If not, leave the fields empty.

Step 3: Column Mapping
The Feed Import feature automatically detects the column separator and the encoding of the feed. However, they can be changed manually.
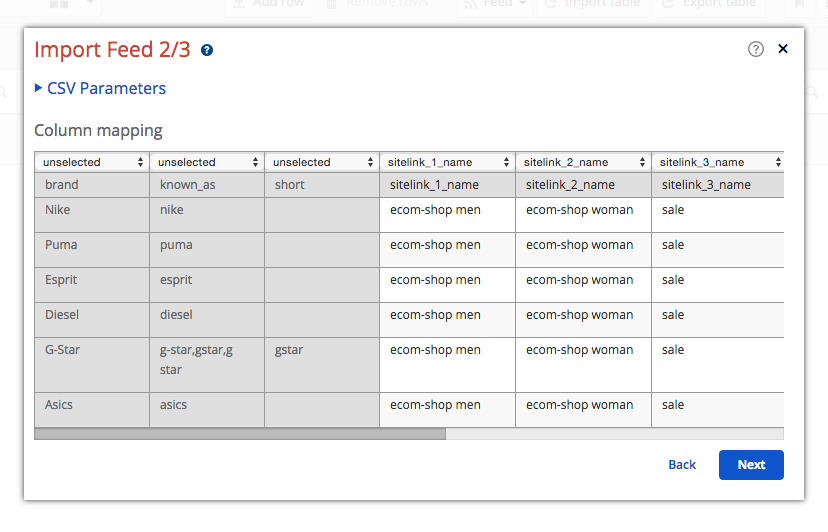
Crealytics’ Search Platform automatically compares the column names of the underlying table with the column names of the feed. It then proposes which feed column to map with which table column. The “name” column of the table must always be mapped. If this is not selected in the mapping, because there is no feed column called “name”, please manually choose one column that should be mapped with the table column called “name”. The “name” column must be unique. It identifies each row of the table. Therefore, please make sure to map it to the unique column of the feed, if possible. Please note, if the “name” column is mapped to a non-unique column (a column that contains the same entry in two or more different rows), the platform will try to keep only the first occurrence of the duplicate row and ignore all subsequent ones.
Step 4: Import Settings
The process is concluded by defining a few settings. These settings can be changed any time by clicking on “Feed” > “Feed Settings”. First, determine if the feed should be imported automatically on a regular basis. This is usually the best decision. Select either “every day” or a week day and a time of day. We advise you to check when your company’s feed is usually updated, and adapt these settings accordingly. If turned off, the feed will only be imported after the completion of the wizard or if you press the button “Feed” > “Import Feed Now”.
Note: If you press “Import Feed Now” while automatic import is turned off, the current table will be replaced by the new one.
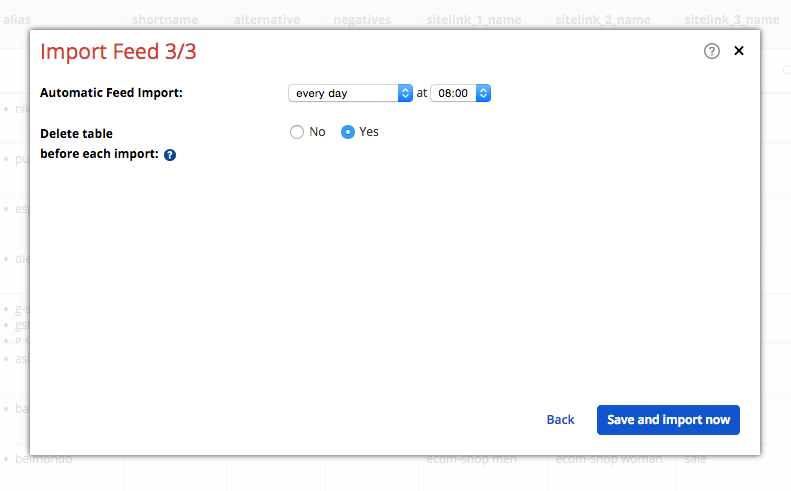
If automatic import is enabled, decide whether to activate “Delete table before each import”. This option will first empty the table and then import all mapped columns. By clicking “no”, there will be more detailed import options.
Step 5: Advanced Import Settings
Three new options are available, if “Delete table before each import” is deactivated.
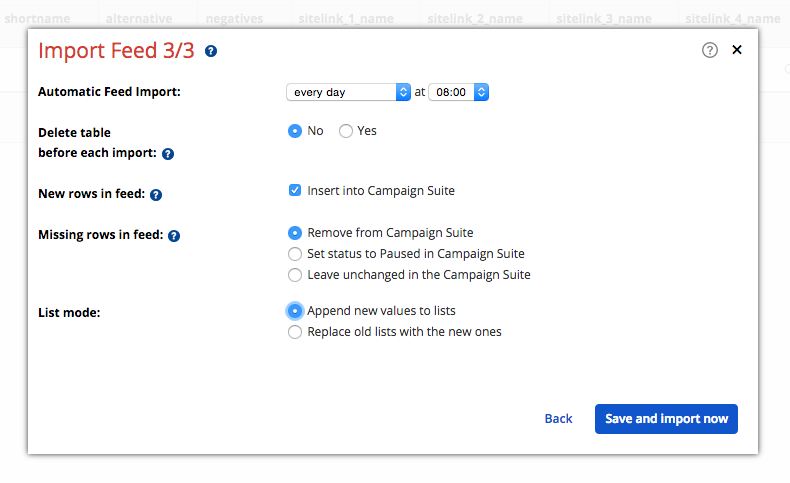
New rows in feed
Decide whether to add rows to the table, which exist in the feed but not yet in the table.
Missing rows in feed
- “Remove from Campaign Suite” – removes rows that exist in the table, but not in the feed.
- “Set status to Paused in Campaign Suite” – keeps rows in the table that do not exist in the feed. The status of such rows is set to “Paused”.
- “Leave unchanged in the Campaign Suite” – leaves rows in the table untouched if they do not exist in the feed.
List mode
If the table and the feed both contain the same list, but with different entries, you have two options:
- Keep the old table entries and add the entries from the feed
(“Append new values to lists”) - Empty the table version of the list, and replace it with the version from the feed
(“Replace old lists with the new ones”).
Back in the table, the “Feed”-button’s icon will have turned slightly green. This indicates that a feed is connected and automatic import is scheduled.
Advanced Hints
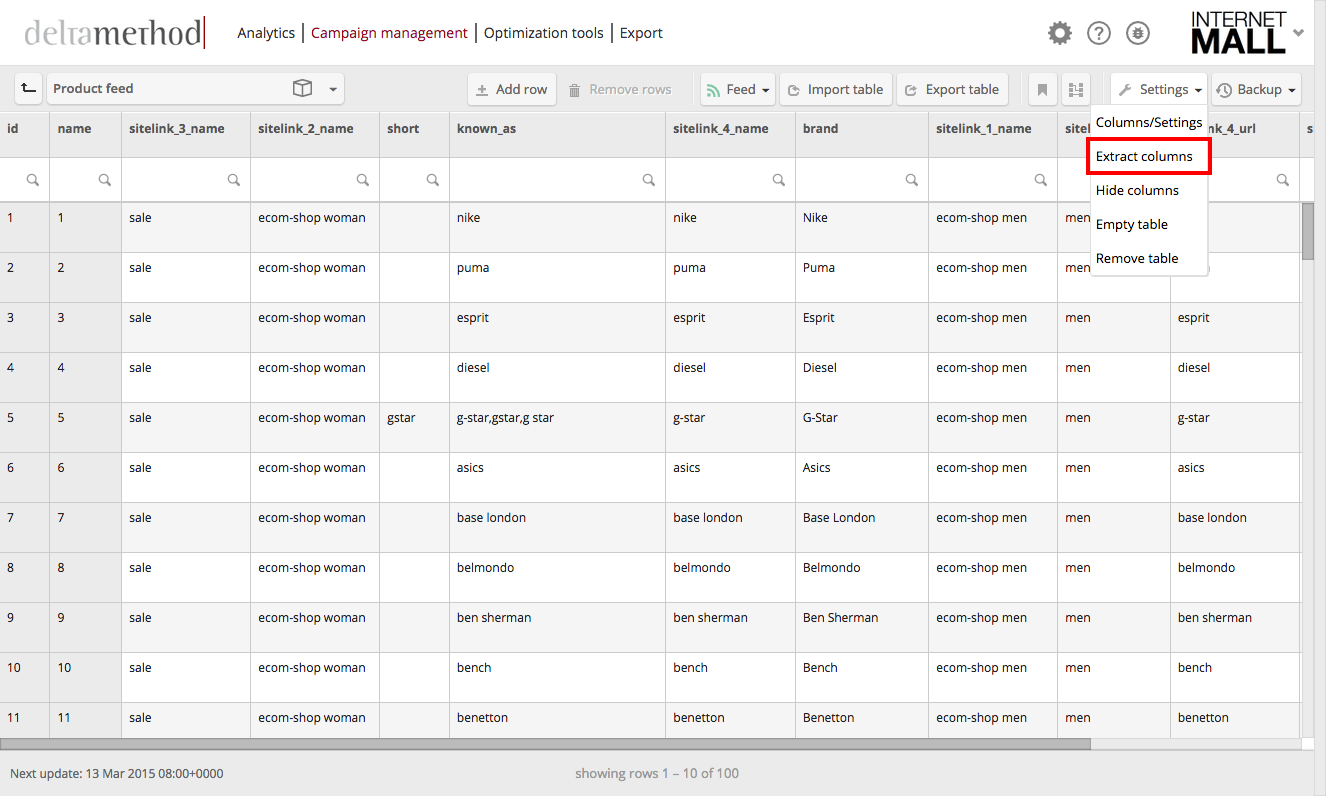
Step 1: Extract columns
To extract columns as tables from a product feed table, click “Settings” > “Extract columns”.
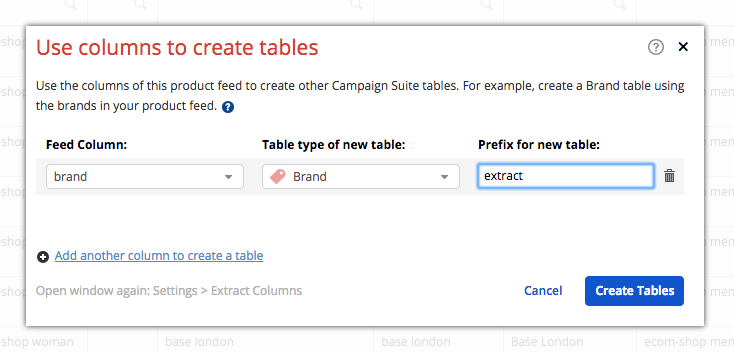
Step 2: Select columns, table types and prefix
Crealytics’ Search Platform will automatically detect columns with names similar to the table types available (like brand and category). If a column is not already listed in the dialogue box, add it by clicking “Add another column to create a table”. Select the column from the product feed table, choose a table type, and set a table prefix. To proceed, click “Create Tables”.
Step 3: Access the newly created tables
The tables, which have just been extracted from the product feed table, can be selected from the table selector in the upper left corner.

For example, the category table may have the name value “Shoes”, while the feed calls the same items just “shoe”. In such a case, it’s not possible to set up a relation between the feed column and the name column of the category table, because the platform will not understand that these are the same product. The best solution is to create a second column in the category table, which is called e.g. “feed_names”. There, write “shoe” into the “Shoes” row. Afterwards, relate the “feed_names” column with the category column in the feed.