After creating a template in Crealytics’ Search Platform, the next step is to check it for mistakes. If there are none, export it. The export will create a file that can be imported into Google Ads via the Google Ads Editor.
Hint: It’s not possible to export templates that “require review”. Those contain setup mistakes you will have to fix.
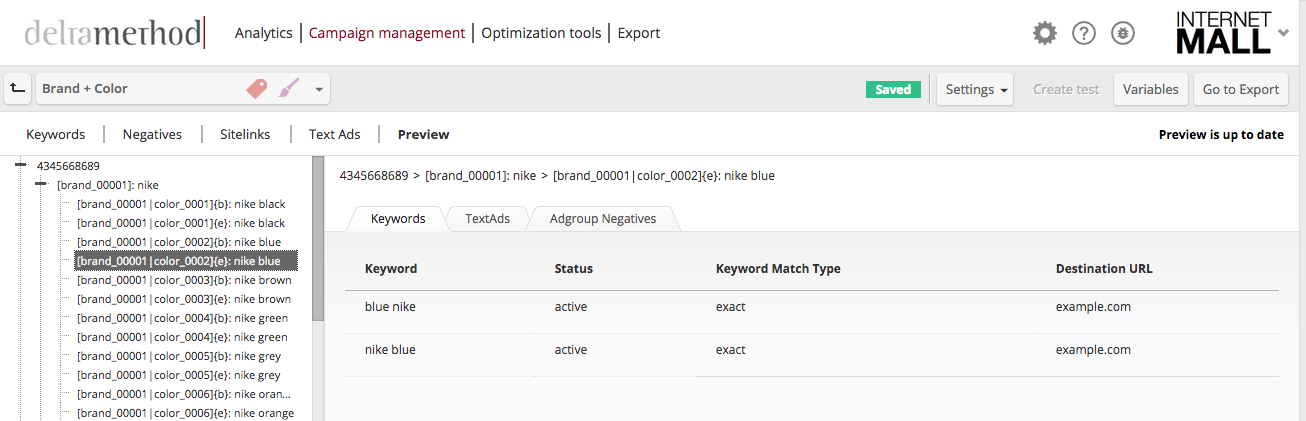
Step 1: Preview
In the template, access the “Preview” tab, and have a look at all generated content before exporting it. If you encounter a mistake, simply go back to the affected tab and make the necessary changes. When everything is in order, proceed with step 2.
Step 2: Export selection
To begin the export, either click “Go to export” in the tool bar, or the “Export” tab in the top navigation. Select the templates you want to export. Be sure that the template content is as you want it to be.
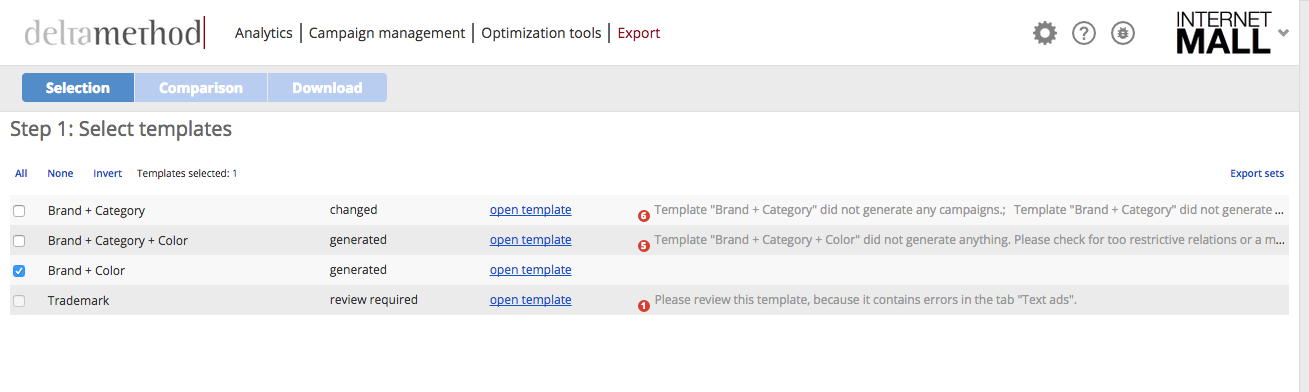
Hint: If a template requires review, a message will appear behind the entry when making the selection of templates for the export.
In the upper right corner of the page, the link “Export sets” enables you to deselect certain elements you don’t want to include in your export file. Click “Save this selection as default” if the same selection will be used in future exports.

Finally, click “Next” in order to generate the selected templates.
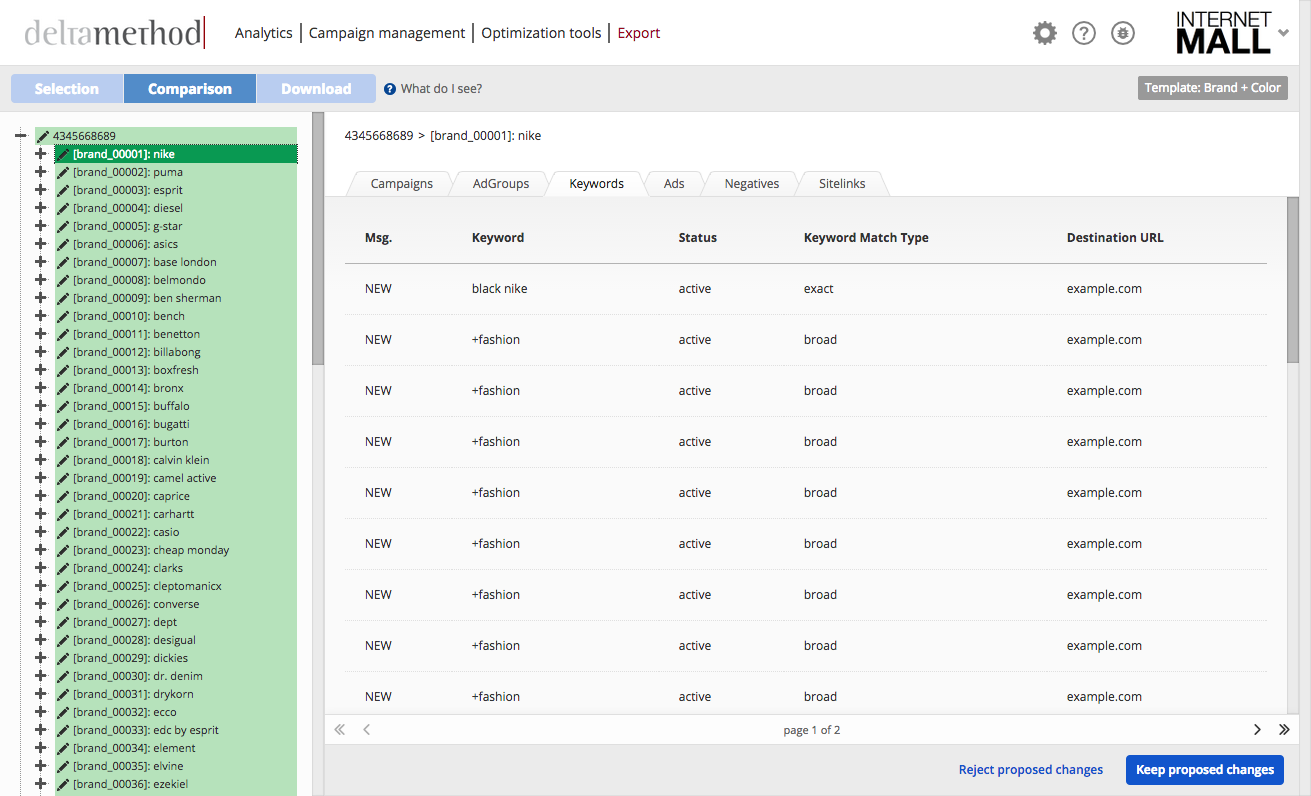
Step 3: Export comparison
After the templates are generated, the comparison step allows you to see the differences compared to previous rounds of generation. If anything has changed or been added, the affected campaign(s) and ad group(s) will be highlighted in green. Crealytics’ Search Platform distinguishes the nature of these changes using icons:
- pen icon
 – changed entities
 - plus icon
 – added entities
 - minus icon
 – deleted entities
 - alert icon
 – conflicting entities
Furthermore, this step enables you to browse all the content again, in order to be completely sure that no mistakes have been made. Choose “Keep proposed changes” or “Reject proposed changes”.
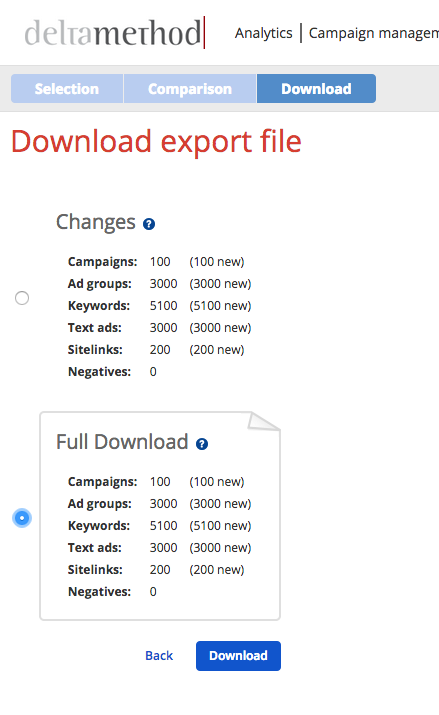
Step 4: Download file
After accepting the changes, the download is made available. You may choose between two options.
- Select “Changes” to get a file containing the differences compared to the previous export. This file will only include the items that were changed. These kinds of exports will generate only a subset of the complete templates, making the Editor upload procedure more efficient.
- In some cases users will need to download the generated content of a whole template. This can be done by selecting the “Full Download” option. Please be aware that in comparison to the “Changes” files, these full export files don’t contain content removed from tables or templates. Furthermore, they may contain campaigns and ad groups set to “deleted”. However, they will not contain any “deleted” text ads.
Proceed by clicking “Download”. Your download will then start automatically.
Step 5: Import the file to the Google Ads editor
After completing the previous steps, we can now upload the export file into the editor.
Step 1 – Start the wizard
Make sure that the exported file has been unpacked. Open an empty spreadsheet in Excel and go to “Data”. Select “Get External Data” > “From Text” and a small window will open. Here, navigate to the folder where your CSV file is saved, select it, and proceed by clicking “Open”. This opens the “Text Import Wizard”.
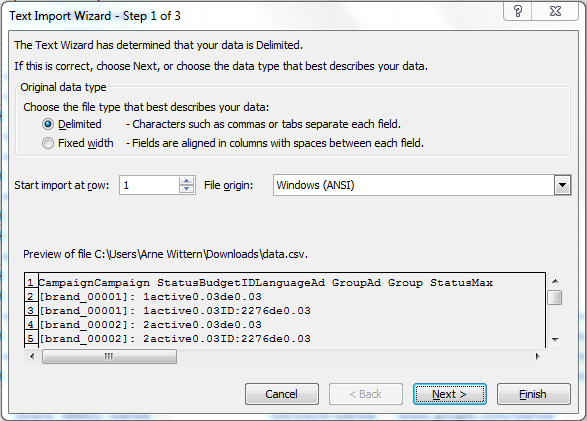
Step 2 – Set the original data type
In the first step of the wizard, make sure that “Delimited” is set as “Original data type”, “Start import at row:” is set to 1, and then proceed by clicking “Next”.
Step 3 – Choose delimiter and text qualifier
Next up is the selection of the delimiter(s) and the text qualifier. Set the delimiter to “Tab” and set ” as text qualifier. Proceed by clicking “Next”.

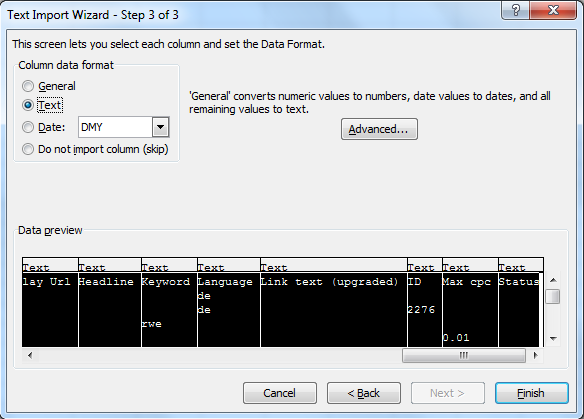
Step 4 – Change the column data type
In step 3, select the first column, then scroll all the way to the right, and select the last column while pressing SHIFT. This selects all columns, allowing you to change the column data format for all of them at once. Choose “Text” and proceed by clicking “Finish”.
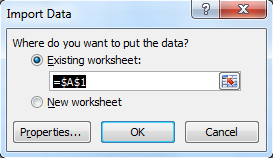
Step 5 – Choose the import location
The last step is to choose whether the imported file should be opened in the current worksheet or in a new one. Select your preferred choice and complete the wizard. The file will now be imported.
Advanced Hints
Option 1: Crealytics’ Search Platform
The first option is to put the erroneous Crealytics’ Search Platform .CSV output file into the Ads Editor and clicking “Keep proposed changes”. Then correct the values in the Search Platform, perform the export process again, and choose the “Changes” option for your download. The new export file will include only the changed content. Load this new export file into the Ads Editor and again click “Keep proposed changes”. Now the Ads Editor contains the content as it should be. Proceed with uploading the content to Google Ads.
Option 2: Excel
Advanced users can instead open the erroneous .CSV file using Excel or any other appropriate software, and manually delete the incorrect content. After saving, it can be opened in Ads Editor and uploaded to Google Ads. The next step is to correct the associated content in Crealytics’ Search Platform and export again. This way you will have an export file containing only the corrected content, which you can also upload to Google via the Ads Editor.

In the window that pops up, you can choose between the changes or the full download.
