At first, follow these steps to upgrade the URLs from the old destination URL format to the new final URL format. Afterwards, decide between three options fort how to deal with internal tracking parameters.
Begin with the first template. Navigate to the Keywords tab and remove the third-party tracking components from the new final URL field. Store the tracking component for later. Perform this update in every template.
Example: Removing third-party tracking
Before upgrading, the old destination URL resides inside the final URL field.

After upgrading, the final URL field should look like this. The URL had to be URL-decoded:

The third-party tracking URL should go into the tracking template (see step 2). In this example, it is: http://thirdpartytracking.com/?channel=SEA&url=
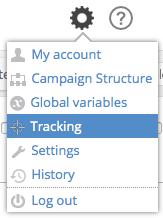 First, click the gear symbol to access “Tracking settings”. There, create a global tracking template. Only if your tracking components differ between different templates is it necessary to create multiple template-specific tracking templates. It is required to use the parameter {lpurl}, which defines where Google will put the respective final URL or final mobile URL for the keyword. You can add up to 3 custom parameters. Their value can be specified later in the Keywords tab of all templates. Please note, only 3 custom parameters are allowed, and they must start with an underscore, e.g. {_cust1}.
Hint: Please be aware that adding custom parameters may cause your keywords to be pending.
Create a tracking template with the remainder from step 1
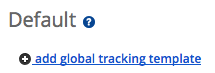
Click “add global tracking template” (or alternatively create template-specific tracking templates) and fill in the tracking components that were removed from the final URL fields in step 1. Put the parameter “{lpurl}” into the position, where the final URL was before.
In this example, it belongs to the end of the statement.

Learn more about tracking settings.
Step 3: Export and edit in the Google Ads Editor
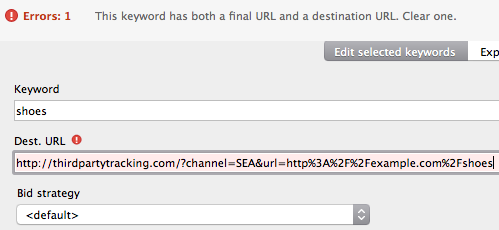
After upgrading URLs in Crealytics’ Search Platform, export all templates. The export file(s) will contain the new final URLs, tracking templates and – if you create them – custom parameters. Import the output files into the AdWords Editor and accept the changes. You will find the new final URLs in the respective fields. However, the Editor will complain about duplicate URLs, because the old destination URLs are still present. Select all keywords, mark the destination URL field, and empty it. This way, you bulk-remove all old destination URLs.
Post the changes to Google Ads.
Are the tracking parameters constant throughout the whole account (e.g. channel=”adwords”) or do they differ between campaigns, ad groups, or even keywords (e.g. adgroup=”umbrellas”)?
Furthermore, consider that the first option requires little work and the second requires a lot of manual work.
Google introduced the new {ignore} parameter, which can be put into final URLs. It tells Google that only the part of the URL preceding the parameter represents landing page content. Therefore, Google does not review a landing page again, if only the parameters following {ignore} change. Navigate to one template after the other, and insert the {ignore} parameter before each of the internal tracking components.

Note: In our testing, we discovered that this option even works without the {ignore} parameter. However, it is unsure how long it will continue to work without {ignore}, which is why it should definitely be used.
This option is only useful if your internal tracking is either equal across the whole Crealytics’ Search Platform account, or it varies across templates. If your internal tracking also varies inside the templates (e.g. it varies across ad groups or across keywords), it is necessary to introduce custom parameters. By these means, it’s possible to customize the tracking template across keywords.
Step 1: Remove the internal tracking from the final URLs
Navigate to one template after the other, and remove the internal tracking components from the URLs.

Afterwards, it should look like this:

Store the removed tracking components somewhere for the next steps.
Step 2: Create tracking templates in the Crealytics’ Search Platform
First, click the gear symbol to access “Tracking settings”. There, create a global tracking template. It is required to use the parameter {lpurl}, which defines where Google will put the respective final URL or final mobile URL for the keyword. You can add up to 3 custom parameters. Their value can be specified later in the Keywords tab of all templates. Please note, only 3 custom parameters are allowed and they must start with an underscore, e.g. {_cust1}.
Hint: Please be aware, adding custom parameters may cause your keywords to be pending.
Create a tracking template with the remainder from step 1
Click “add global tracking template”, and fill in the tracking components that were removed from the final URL fields in step 1. If your tracking components differ between templates, campaigns, ad groups, or keywords, don’t fill them into the tracking template. Instead, write a custom parameter name (e.g. {_internal}) in the tracking template where the internal tracking should be located.
Put the parameter “{lpurl}” into the position where the final URL was. In this example, it belongs to the beginning of the statement. Without a custom parameter name, it will look like this. There will be no need to continue with step 3.

With a custom parameter name, there will be no internal tracking parts visible. Only in this case, proceed to step 3.

Learn more about tracking settings.
Step 3: Put the tracking components into the custom parameters
Navigate back to the templates from which the internal tracking components were removed. In each template, there will be a field for the new custom parameter. Put the internal tracking components into that field.
![]()